

Manufacturing processes are quite complex, and the choice of a production method is directly related
Learn More →
It is challenging to achieve the desired coating and adhesion on anodized aluminum without the correct knowledge and techniques. Anodized aluminum adds a degree of complexity to paints and primers. This guide explains all the technical aspects and offers practical suggestions to balance form and function. It also describes essential tools and maintenance techniques and discusses proper surface preparation techniques so anyone can achieve a professional-like finish. Whether a professional or a DIYer, this post will help you hone your skills and produce exemplary results.
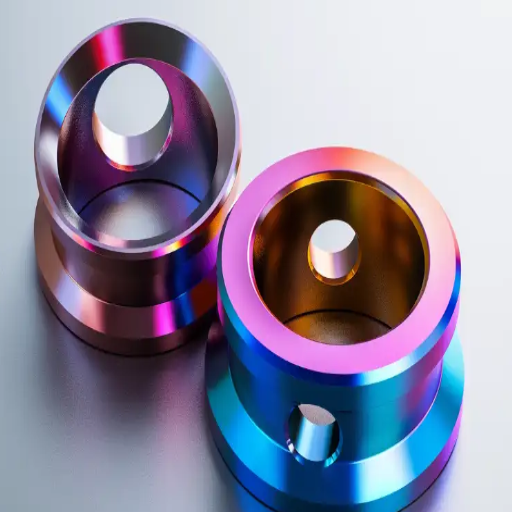
Anodized aluminum is aluminum with an outer layer of aluminum oxide created through an electrochemical process. This layer further improves the alloy’s natural strength, making it scratch- and weather-resistant and corrosion-resistant. With these advantages, if a specific look needs to be achieved, a protective layer must be painted over for harsher environments, or to freshen and modernize aging anodized aluminum, painting it becomes a necessity. Painting the anodized aluminum opens it up to more applications, making it a design-friendly material that can be used without limitations.
Moreover, anodized aluminum is lightweight and exceptionally corrosion-resistant. Otherwise, it wouldn’t be so easily acceptable. Anodizing leads to forming a controlled oxide layer that provides the aluminum with additional protection and improves the performance of the alloy under different conditions. In the following section, common questions and relevant descriptions concerning anodized aluminum are answered below:
Why is anodized aluminum valuable?
What is the thickness of the anodized layer?
The standard anodizing process produces an oxide layer that is 5 to 25 microns thick, while hard anodizing can be between 50 and 100 microns, depending on the use case.
What is the procedure for painting anodized aluminum?
Remove all contaminants from the surface before cleaning.
To promote paint adhesion, sand or lightly etch the anodized layer.
Apply primer appropriate for metal.
Let the primer dry before applying the first coat, and then allow the paint to dry before applying the next coat. Do not use excess paint.
Is it possible to dye anodized aluminum?
A color can be added to anodized aluminum, while the anodized aluminum is put into a seal. After the color is applied via dye bath, the sealed layer gives color while protecting it, providing durability.
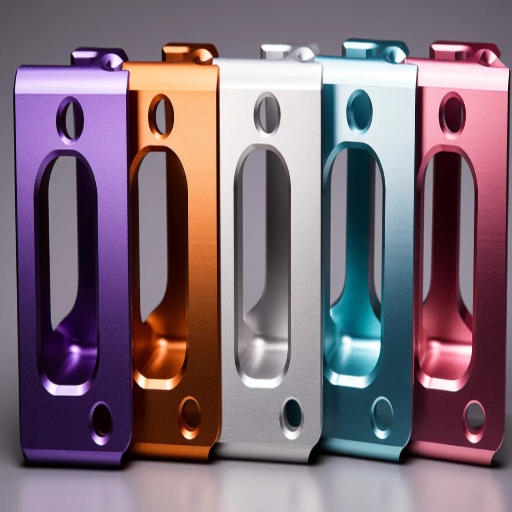
Utilizing the properties and customization options of anodized aluminum, these materials can be used for many different purposes, such as architectural designs and electronics.
Although anodized aluminum is highly resistant to corrosion, there are cases where painting it enhances its aesthetics or performance. Here are the primary motives why painting anodized aluminum may be beneficial:
Increased Aesthetic Options
Anodized aluminum can be painted in a broader variety of colors and shades than natural anodization colors. This is especially important in architectural works or when a specific scheme has to be met.
Custom paint finishes such as gloss, matte, or metallic can improve the visual appeal.
Improved Corrosion Resistance
Even though anodized aluminum is painted, it is still highly corrosion-resistant. However, additional paint layers create another barrier that protects the paint from harsh environmental elements such as industrial pollution or salt water.
Repair or Recoating of Defaced Surfaces
The passing of time marks discoloration and surface damage on anodized aluminum. Painting restores the aluminum’s aesthetic while prolonging its durability.
Painting also protects surfaces where the anodized layer has compromised during fabrication or handling.
Improved Adhesion for Specified Applications
Sealants or specialized coatings must have better surface adhesion to be adequate for industrial purposes, and painting achieves this through appropriate surface preparation.
Working with exposed edges of Anodized Aluminum
The following steps and recommendations ensure the optimum quality of the final product when painting anodized aluminum.
Surface Cleaning
Before painting, the aluminum surface must be cleaned of dirt, such as grease or oil. A mild or alkaline detergent combined with a thorough rinse is recommended.
Abrasion
Pretreating the anodized surface with grade 400-600 sandpaper increases paint adhesion and provides the paint with more effective surfaces to adhere to.
Priming
The initial layer of paint must be compatible with the anodized coating and have a chromate or epoxy primer base for better adherence.
Paint Selection
Only acrilyc paint of the best quality should be used, polyurethane or epoxy paint also works. Those paints contain both strong adhesion to and strong durability on the level of anodized aluminum.
Painting Conditions
To ensure equal paint application and curing, maintain a moderate ambient temperature of 10-30 degrees Celsius and low humidity.
Coating Thickness
Applying thinner layers over time leads to less flaking; the optimum thickness is 1.2 to 1.5 mils.
If these steps are meticulously followed, the anodized aluminum can be painted and sculpted to serve many aesthetic and functional needs.
Painting anodized aluminum provides excellent durability alongside ample aesthetic options. First, the anodization of aluminum creates a strong base that ensures adhesion to the paint and is thus unlikely to peel or crack over time. This enhances corrosion resistance and longevity, especially in extreme conditions. Second, anodized Aluminum gives freedom of design and creativity with myriad available colors and various finishes ranging from matte to glossy. For best results, ensure the anodized Layer is 10-25 microns thick (suitable for moderate to severe conditions), and paint coating thickness stays between 1.2-1.5 mils (30-38 microns). Following these parameters ensures structural integrity while achieving functional and aesthetic value.

Cleaning the Surface
Clean the anodized aluminum surface to eliminate dirt, grease, or contaminants. Applying gentle detergent in hand-warm water with a soft cloth or sponge ensures the detergent is mixed correctly. Rinse and dry the surface with clean water to prepare it for painting.
Sanding the Anodized Layer
Light sandpaper (320-400 grit) smooths anodized rubbing aluminum, improving the surface’s ability to hold primer and paint. However, being too aggressive can damage the anodized layer, so be careful while sanding.
Applying a Suitable primer
Choose specially designed, high-quality primers for metal and anodized surfaces. Gently spray or brush the primer, ensuring all areas are covered. After applying, dry thoroughly before painting according to the manufacturer’s instructions.
Painting the Surface
Always choose a paint compatible with anodized aluminum and use spray paint or high-quality brushes. Wait for the first layer to dry, then repeat for additional coats. Once completely dry, seal with a protective topcoat for improved durability.
Cleaning anodized aluminum requires proper care to preserve its finish and longevity. Begin using a mild detergent mixed with warm water, ensuring it is safe for metals. Apply the solution with a soft, non-abrasive cloth or sponge to avoid scratching the surface. For stubborn stains or dirt, gently use a non-scratch pad. Avoid harsh chemicals or acidic cleaners, which can damage the anodized coating. Rinse thoroughly with clean water to remove any residue, then dry the surface with a lint-free cloth to prevent water spots. For optimal results, follow these technical parameters:
Always conduct a small test on a less visible area before complete cleaning to ensure compatibility.
Sanding is essential for preparing surfaces and ensuring paints or finishes bond well. Smooth sanding facilitates adhesion. Below are the critical parameters and recommendations for light sanding. I hope you find them helpful.
Sandpaper grit: 180–220 grit sandpaper has proven to be the best for most surfaces. It helps remove superficial damage without damaging the material.
Sanding technique: Sand in circles or back and forth. Apply even light pressure. Never apply too much pressure, as it may weaken the surface or change its geometry.
Surface preparation: The surface must also be prepared. It must be clean and free of dust, dirt, or grease that may have ground into it.
Dust Removal: After sanding is finished, wash surfaces with a tack cloth or damp lint-free cloth to ensure that sanding waste is removed thoroughly.
Light sanding is crucial for various tasks, from furniture refinishing to painting walls. Follow these recommendations for professionally looking work. To ensure the sanding cooperates reasonably with the materials used, carry out a small trial of the process in a more inconspicuous place.
To apply a self-etching primer, I first ensure the surface is clean, dry, and free of grease or dust. This primer type is most suitable for raw metal surfaces because it contains acid, which etches or scratches the metal and aids in better bonding. I self-mix the primer thoroughly for 1-2 minutes before use.
The primer is sprayed from a distance of 8-12 inches in thin and spaced-out layers. Depending on manufacturer recommendations, about 5-10 minutes of drying time is given for each layer. Usually, one or two layers do the job. The primer dries in 30 minutes but can take longer. If a smoother finish is preferable, I shallower sand it with fine-grade sandpaper, most likely holding 400-600 grit.
Technical Parameters:
The recommended drying time per layer is 5 to 30 minutes; however, confirm with the product label guidelines.
For aerosol cans, the optimal distance for spraying is 8-12 inches.
The ideal temperature for best results is between 50 to 90 degrees Fahrenheit.
Recommended grit for sanding if needed: 400 to 600.
Adhering to these steps is fundamental to obtaining the best adhesion and smooth base for other coatings.
Acrylic or enamel paints are ideal for anodized aluminum due to their excellent bonding capability and durability. These paints will stick best to the prepared surface and have a smooth finish. Make sure the paint has a metal formulation for increased performance. Also, a good-quality primer will improve adhesion and help prevent chipping over time.
Ensure appropriate adhesion and durability for anodized surfaces by considering the following:
Paint Type
Acrylic Paint: A multi-purpose paint with high resistance to adhesion loss from UV light. It can be used indoors or outdoors.
Enamel Paint: This has a rugged, shiny finish. It is very effective in reducing wear and corrosion on metal surfaces.
Surface Preparation
Application Conditions
Durability Parameters
For paints meant to last, ensure an abrasion resistance of over 2H pencil hardness.
Fading over time is an issue with outdoor paints; select those with UV protection enabled.
Select paints are described as corrosion-resistant when the anodized surface is expected to contact moisture frequently.
Follow these instructions, and you will be confident when selecting and applying paints, which will make the anodized aluminum surface smooth and tough.
Knowing the differences between two paints, oil-based and water-based paints. When comparing performance, use, and durability, these paints, talk build and breakdown, I try to keep the costrued as clear as possible.
Oil-Based Paints: When made using synthetic Alkyds or natural oils, these paints tend to dry slowly (usually 6 to 8 hours) but add a shed of a satin finish. They require thinning and cleanup via solvents like turpentine or mineral spirits.
Water-Based Paint: Uses water as a base, is much drier (often within 1 hour), and is easy to clean with soap and water by nature.
Oil-Based Paint: These paints are better suited for highly used or damaged places like furniture and are resistant to wear and tear, making them more durable. But these Paints tend to deposit yellowish returns over time.
Water Based Paint: More prone the yellowing due to not being as strounger in deep painting to layer o color through robust like other Paints but does maintain better the vibrant looks.
3: Effect on Environment and Ventilation:
Oil-Based Paint: Much higher levels of bounding organic components cause air pollution and contribute to indoor air pollution; thus, using these paints requires ventilation.
Water-Based Paint: Many low-bounding organic components are more eco-friendly, flopping up better indoor projects.
4. Technical Parameters Comparison:
|
Property |
Oil-Based Paint |
Water-Based Paint |
|---|---|---|
|
Drying Time (Touch) |
6–8 hours |
~1 hour |
|
VOC Content |
High (50–380 g/L) |
Low (<50 g/L) |
|
Abrasion Resistance |
Excellent |
Moderate |
|
Cleanup |
Solvent-based (e.g., turpentine) |
Water and soap |
|
UV Resistance |
Moderate |
High |
|
Yellowing Over Time |
Yes |
No |
Oil Base: Carefully used on external trim, doors, and surfaces with heavy traffic, as well as on battered, unfriendly sites.
Water Base: Appropriate for walls, ceilings, and other areas that need rapid drying with less smell.
Evaluating these characteristics enables the selection of the correct type of paint, which, in conjunction with the environmental and technological aspects, meets the required necessities.
To ensure durability when working with surfaces, I recommend using a combination of epoxy and topcoats. Epoxy acts as a lower base layer adhesive that can be plastered over floors, countertops, or industrial surfaces and is resistant to wear and tear. Applying a compatible topcoat increases gloss, UV resistance, and protection from chemicals and abrasion.
Technical Parameters:
Epoxy Layer Thickness: In the order of 2–3 mm for adequate durability.
Curing Time: 24–72 hours, depending on temperature and humidity.
Topcoat hardness: must be greater than 80 for heavy-duty works for topcoats.
UV Resistance: Polyurethane for effusion of UV protection.
Application temperature range: 16ºC to 29.5ºC optimum results seen.
Combining epoxy and a good-quality topcoat will allow the surface to withstand mechanical and environmental conditions longer.

Surface Cleaning: II. Anodized Aluminum Surface Cleaning—Clean the surface of anodized aluminum with detergent and water to remove dirt and contaminants that could affect adhesion. Rinse and allow the surface to dry completely.
Light Sanding: III. Anodized Aluminum Surface Light Sanding – Sand anodized aluminum with fine sandpaper (320-400 grit) will slightly roughen the surface and allow the paint to adhere better. Wipe the surface with a lint-free cloth to clear sanding debris.
Primer Application: IV. Application of Anodized Aluminum Primer: Use high-quality primers for aluminum or non-ferrous metals. Apply with smooth strokes and let cure as directed by the manufacturer.
Paint Application: V. Anodized Aluminum Paint Application—Use a fill-in paint that corresponds with your primer. Apply paint in thin layers using a brush, roller, or spray, allowing each subsequent layer to dry.
Topcoat Addition (Optional): VI. Anodized Aluminum Protective Top Coat Addition – For protection and durability, apply a specified topcoat, ensuring proper curing throughout each layer.
Final Inspection: VII. Surface Inspection and Touch Up – After paint drying, check the surface for imperfections and smoothen out when needed to achieve a strong, durable finish.
Commonly Asked Questions about Priming Aluminum for Coating
Q1. What is the recommended primer for aluminum surfaces?
An etch primer or epoxy primer is the recommended priming material. Such primers have a strong bond with aluminum since they offer great corrosion protection and excellent surface roughness for the paint adhesion layer to bond.
Q2. What surface preparation is required before priming aluminum?
Cleaning procedures must be performed to remove dirt, grease, and oxidation. A degreaser or solvent cleaner should be used, along with light hand sanding or abrasive blasting with 120— or 150-grit sandpaper. For maximum efficacy, aim for contaminant-free and smooth surfaces.
Q3. What surface preparation is required before priming aluminum?
The optimal conditions for working with aluminum are: Temperature Range: 50°F to 85°F (10°C to 29°C) Humidity Level: Less than 85 percent to keep unwanted condensation off the surface. These conditions result in the best adhesion and drying of the primer.
Q4. What is the appropriate thickness for the primer layer?
The primer layer should be applied as a thin, uniform coat of about 1-2 mils thickness (25-50 microns). The product details will confirm the best coverage.
Q5. How long should I wait after applying primer before starting to paint?
Curing times differ based upon products used, however in average recommended cases it takes between 1 to 4 hours. Always check the user guide to ensure proper curing times.
The information provided should assist you in successfully performing aluminum coating.
Q1. What surfaces need preparation before base coat application?
All surfaces attended to should be cleaned, degreased, and primed. Check that the primer layer is adequately cured, and if so, that it has been lightly sanded, as specified, to create a smooth adhesive surface. A tack cloth prevents dust and contaminants from being deposited on the surface.
Q2. How should a base coat be applied?
The base coat should be sprayed with a high-quality spray gun so that it is applied in even thin layers. The gun should be held at a distance of 6-10 inches (15-25 cm) from the surface, unchanged throughout. Standard conditions (70°F/21°C, 50% relative humidity) should allow 10-15 minutes of flash-off time between coats, up to 2-3 coats. Check the product’s instructions for flash-off time and recommended base coat application.
Q3. What are the optimal environmental conditions for base coat application?
The base coat should be applied in a clean, open area that is not below 60°F (16°C) or above 80°F (27°C) and has a relative humidity below 65%. Avoid applying it in too humid or cold regions, as this will affect the adhesive and drying quality.
Q4. How thick should base coat layers be?
The thickness of each base coat should typically have a film thickness of no less than 0.5-1.0 mils (12.5-25 microns). A wet film thickness gauge can be used to maintain this range during application.
Q5. What is the recommended time to cure the base coat before proceeding?
Here are some pointers for base coat curing times: The specific product used and other environmental factors will play a significant role. However, on average, the base coat takes 20-30 minutes to dry to the touch. Waiting at least 60 minutes for curing before proceeding to the precise coat application is essential. The manufacturer’s recommendations will give you more precise curing times.
By following these pointers, you can achieve the best results during the aluminum coating process.
Meeting professional standards is significant when it comes to finishing. In my experience, the base coat, under optimal conditions of around 70 degrees (around 21 degrees Celsius) with about 50% relative humidity, takes about 20-30 minutes to dry to the touch. But, in almost every instance, I always ensure a minimum of 60 minutes of curing time before applying the clear coat. Solvents need to be allowed to evaporate to aid in stabilizing the base. Remember that lower temperatures and higher humidity can also change the drying times, and adjustments must be made. Always opt for the product’s technical data sheet for the specifics.
Adhesion Problems
One significant problem is correct adhesion during the painting of anodized aluminum. This particular issue concerns an aluminum oxide layer acting as a cap. Addressing it requires comprehensive surface preparation. Proven methods include cleaning the surface to remove contaminants, some light sanding for better mechanical bonding, and applying a high-quality etching primer.
Flaking or Peeling Paint
If there is a lack of surface preparation or products that should not be used together are used, paint is likely to flake or peel. Ensure to degrease the aluminum and apply the appropriate primer for metal surfaces. Following manufacturer guidelines for drying times between application coats will also help avoid the issue.
Uneven Coats
Poor technique or the wrong tools can lead to streaks or uneven surfaces. Use a good-quality spray gun or a smooth-finish applicator to achieve the desired look. To achieve a flawless finish, apply multiple light coats instead of one thick coat.
Environmental Factors
High humidity levels and extreme temperatures are unfavorable when working with anodized aluminum, as it can extend the drying period and negatively affect the finish. Whenever possible, if you have a set drying expectation, be prepared to alter that expectation according to the recommended parameters for the product.
Corrective measures in the surface preparation and application procedures can resolve subpar paint adhesion on anodized aluminum. First, it is crucial to clean the surface using a degreaser or isopropyl alcohol to eliminate unwanted contaminants like dirt, grease, oil, etc. Then, clean the surface and apply fine texturing by sanding it using fine-grit sandpaper, 320 to 400 grit, for better mechanical bonding.
Then, anodized aluminum primers, such as etching and self-etching primers, can be applied. Observe the manufacturer’s instructions and recommendations regarding drying times and the thickness of the application. Primers are often used in smooth, even layers and allowed to dry for 30 to 60 minutes before painting.
Moreover, check that the paint is applied in the suggested environmental conditions. For optimal adhesion and drying, keep the temperature between 60°F 85°F (15°C and 29°C) and the relative humidity below 50%. Poor adhesion can also be addressed using quality paints compatible with the metal surface and the recommended application procedures.
Correct surface preparation and application prevent paint from chipping and peeling for anodized aluminum surfaces. After thoroughly washing the surface from dirt, grease, and contaminants, sanding it with fine-grit sandpaper, such as 320 to 400 grit, enhances paint adhesion. Also, using quality anodized aluminum primers, such as self-etching or etching primers, helps establish strong bonds between the aluminum and paint. Depending on the manufacturer’s guidelines, the primer must be applied in thin coated layers and adequately dried for a minimum period of 30-60 minutes.
Furthermore, it ensures that the environmental condition during the painting process is satisfactory. Optimal temperatures should not exceed 60 to 85 degrees Fahrenheit (15-29 degrees Celsius), and the humidity must be below 50%. Use a paint exclusively designed for metal surfaces, such as epoxy, acrylic, or urethane-based paints, as they provide much more durability and toughness. Paint with as thin and even coats as possible, allowing enough time to dry between layers. Seal the top surface with a clear coat for metal surfaces to protect the underlying paint from chipping.
When combined with following the manufacturer’s recommendations for primer and paint and the previous tips provided, the chances of peeling or chipping and the longevity of the painted anodized aluminum surface are drastically increased.
If I need to keep the painted covering on aluminum, I clean it using a mild soap and water solution, which avoids harsh chemicals that might ruin the finish. When possible, I protect the surface from prolonged exposure to extreme weather conditions and put on a protective wax or sealant once a year to ensure durability. Other things to note are keeping abrasives to a minimum and ensuring all cleaning materials, such as sponges or cloths, are soft to prevent scratching. In terms of surface inspection, I perform this every few months for chips or scratches so that I can use touch-up paint to prevent further ruin.

Re-anodizing painted anodized aluminum is generally not possible without first removing the paint. The anodizing process requires a clean, uncoated aluminum surface to effectively create a new oxide layer. Paint is a barrier preventing the anodizing chemicals from interacting with the metal. Additionally, paint removal can be challenging and may risk damaging the underlying aluminum. Therefore, if re-anodizing is essential, the paint must be stripped with suitable methods, and the aluminum must be thoroughly cleaned and prepared before beginning the anodization process.
Achieving a successful outcome when re-anodizing painted, anodized aluminum requires attention to detail and proper preparation. The operation includes the following steps:
Paint Removal: All coatings can be removed using chemical paint strippers or abrasive techniques, but both must ensure that no remnant is left behind. Care should be taken not to damage the aluminum during paint removal.
Recommended Parameters: Noncorrosive, paint-striping solvents that do not react with aluminum should be used alongside limited abrasive techniques lest the aluminum needs to be repaired.
Surface Cleaning: After the paint removal process, the aluminum must undergo oxygen washing to remove any foreign substances, such as dust particles, oils, and other chemicals, that could contaminate the surface for anodizing.
Recommended Parameters: For perfect cleaning, a pH-neutral aluminum cleaner followed by a deionized water wash will guarantee that no spots remain on the metal surface.
Surface Preparation: Apply an acid or alkaline etching solution to polish the rough surfaces of the metal, forming a level base for the even coating of the oxide layer.
Recommended Parameters: Acid etch with Phosphoric acid (10-20%) at temperatures between 100- 120 degrees Fahrenheit for 5-10 minutes.
Anodizing Procedure: Anodizing commences preceding the anodizing step, which entails submerging the cleansed aluminum in an electrolytic solution where oxygen cannot reach and then running an electric current for a defined time to create a fresh oxide layer.
Recommended Conditions: Sulfuric acid is suggested as an electrolyte at a concentration of 15-20% and temperatures within the range of 68-72°F. A current density of 12-18 ASF (Amps per Square Foot) should be used for 20-30 minutes.
Oxide Layer Sealing: The oxide layer is usually sealed with hot water or a nickel acetate solution to enhance durability and prevent corrosion.
Recommended Conditions: For best results, seal in deionized water at a temperature range of 190-210°F for 15-30 minutes or use nickel acetate solution at 170°F.
If these steps are followed carefully, along with the parameters set in this guide, the quality and integrity of the aluminum can be preserved while completing re-anodization as needed.
The first step before re-anodizing painted aluminum is completely removing the existing paint layer. Mechanical procedures such as sanding or blasting aluminum work best, while aluminum paint strippers work best. Carefully masking off the sensitive portions of the aluminum is critical. Hence, the exposed surface is not damaged.
While applying a stripper, always observe the safety instructions and manufacturer indications on its use alongside aluminum compatibility. One of aluminum’s most widely used paint-stripping methods is methylene chloride-based strippers. A more neutral approach involves cleaning strips using mild alkaline detergent or phosphoric acid (10-20%) mixed with water and warmed to around 100 – 120 degrees Fahrenheit, then manually cleaning after 5 to 10 minutes.
Determine if any characteristics on the surface could complicate polishing before stripping and cleaning. These imperfections need to be corrected beforehand. At this stage, the metal’s surface should be clean and devoid of additional superficial layers, allowing it to proceed through the anodizing process through the recommended parameters for best results.
Leading CNC Metal Machining Provider in China
A: It is not recommended to paint directly on anodized aluminum surfaces because the anodized layer can make it difficult for the paint to adhere correctly. To ensure a successful paint job, prepare the surface by thoroughly cleaning the aluminum and using a suitable primer.
A: Preparing the surface involves cleaning the aluminum part to remove dirt, grease, or other contaminants. You should also lightly sand the surface to help the paint adhere better. Using a primer, such as a zinc chromate or chromate primer, can also improve adhesion and provide a better base for the paint.
A: A zinc chromate or chromate primer is highly recommended for anodized aluminum parts. These primers help the paint adhere better and provide a suitable substrate for the top coat of paint.
A: Applying multiple thin coats of paint is often better than using one thick coat. Numerous thin layers will help the paint stick more effectively and provide a more durable finish, especially in harsh conditions.
A: Yes, you can repaint anodized aluminum projects. Before applying the new paint, properly prepare the surface by cleaning and sanding it, then using a primer.
A: Powder coating provides a durable, long-lasting finish that resists scratching and harsh conditions. It also offers an even coat of paint that can enhance the appearance of anodized aluminum parts.
A: CNC machining can create precise and smooth surfaces on aluminum parts, but it may also leave residues or oils that could affect paint adhesion. It’s crucial to clean the aluminum part thoroughly before painting to ensure that the paint adheres properly.
A: Cleaning the aluminum is essential to remove contaminants like grease, dirt, and oil that can prevent the paint from adhering correctly. Proper cleaning helps the paint stick better and ensures a long-lasting paint job.
A: While it is possible to paint an aluminum part without a primer, using a primer is highly recommended. A primer provides a better substrate for the paint to adhere to and can enhance the durability and appearance of the final coat of paint.

Manufacturing processes are quite complex, and the choice of a production method is directly related
Learn More →
There are two major manufacturing methods for producing plastic prototypes that most people find useful
Learn More →
As a person involved or interested in the design and production of plastic components, it
Learn More →