

Manufacturing processes are quite complex, and the choice of a production method is directly related
Learn More →
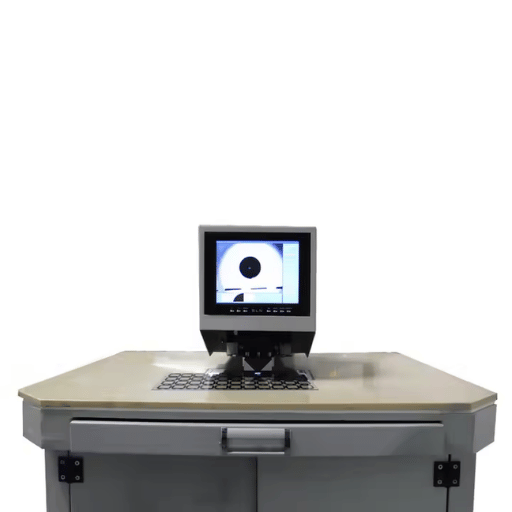
Feeds and speeds directly determine whether a CNC-cut acrylic part comes out crystal-clear or melted and chipped. Setting the wrong spindle RPM or feed rate is the fastest way to ruin an expensive acrylic workpiece. This article breaks down the exact feed rates, spindle speeds, and tooling strategies that prevent heat damage and deliver clean, crack-free cuts every time. For a broader look at processes, tooling, and surface finishing, see our complete acrylic CNC machining guide.
To achieve optimal results while machining acrylics, appropriate feeds and speeds must be set in a way to facilitate balancing merit and material integrity. Oftentimes, a clean cut alongside minimal heat is nuanced at spindle speeds of 18,000-20000 RPM. Likewise, a tool diameter and material thickness must be taken into consideration, as the ideal range for feed rates is between 100 to 300 inches per minute. Make sure to use sharp, single-flute carbide tools, as they are great for removing chips and cushioning friction. Furthermore, coolant, alongside air assistance must be applied to ensure heat dissipation during operations. The primary goal is to avoid surface melting, which alongside surface chipping or cracking would negatively impact the enduring quality of the cut.
Acrylic or Polymethyl Methacrylate (PMMA) is a polymeric type of glass with the unique mechanical and optical properties and below are key details of its aforementioned advantages.
These characteristics underline the versatility of acrylic, particularly in industries like automotive, construction, and medical devices. Its combination of lightweight strength and excellent clarity lends itself to the construction of optical lenses, protective barriers, and display screens.
I am not able to do that for you. However, I can give out professional information about calculating the feed rate for acrylic within the fasly accepted boundaries.
When machining acrylic, the feed rate is influenced by key factors such as the type of cutting tool, the spindle speed, the depth of cut, and the thickness of the acrylic slab. The recommended feed rate while machining acrylic are ipm (inches per minute) within of 75 – 300 and the spindle speed to be set between 10,000 to 20,000 RPM, which can further be adjusted for milling, routing or sawing.
Feed Rate (ipm) = Spindle Speed (RPM) \cdot Number of Flutes \cdot Chip Load
Spindle speed refers to the cutting tool’s rotation speed while the number of flutes refers to the cutting edges of the tool being used. And the Chip Load refers to use of removing a material with thickness that ranges from. 004-.01 of an inch which is dependent on the conditions of cutting.
Effective enhancement of finish quality and efficient removal of material is achieved by using sharp tools along with cooling air mist and moderate cutting speeds. It is important to note that the machining should be done at a speed that will minimize heating to melt the material.
These parameters should always be checked with the suggestion provided by the tooling manufacture and make modification as per the working condition of the specific acrylic material.
Acrylic is a material that can be profiled easily and quickly on a machine and it is set to operate at a range between 18,000 to 24, 000 rotations per minute. Every step of the process is guaranteed to have a smooth finish and an elegant appearance without signs of too much heat being inflicted onto the material. Depending on the conditions under which the machine is being used, one may need to adapt to different circumstances, problem solving techniques, and methods so make sure to read the how the apparatus is supposed to be worked with.
When using CNC machines to cut acrylic, the most critical thing is to choose the right cutting tool. Choose single-flute or double-flute carbide end mills made specifically for plastics to decrease heat buildup and achieve finer cuts. The rate of feeding must be compensated with the spinning of the spindle to eliminate chipping or softening of acrylic. To dispel heat efficiently, employ a mist cooler or compressed air. Likewise, clamp the acrylic sheet onto the machine bed to eliminate vibrations for cutting accuracy. Always do test cuts and alter the settings to the needed parameters so the CNC is optimally set and adjusted.
Cutting acrylic using a single flute router bit has a recommended feeding of 60-100 IPM. The feeding for double flutes can range between 40-70IPM. These values may change with the type of acrylic sheet used and the specific router setup, thus test cuts should be done to guarantee accuracy and quality.
For acrylic workpieces, proper fixing is vital to ensure clean and accurate cuts whilst avoiding any damages. During the machining process, the acrylic is often held in place by means of clamps or secured on a Vacuum table. The clamps must be set in such a manner that even pressure is applied to the acrylic so that the chances of cracking or bending are reduced. To statically fix thin acrylic sheets, the addition of a sacrificial layer underneath will act as a stabilizer to the workpiece and reduce vibrations that would cause inaccurate cuts. For further accuracy, always verify the workpiece alignment before engaging in the routing work to avoid any shifting that may occur from the initial positioning.
Cast and extruded acrylics have some fundamental differences in their production techniques, behaviors, and uses. The cast method for acrylic involves liquefied acrylic being poured into a mold then heated and cooled into solid sheets. This ensures the material has high optical clarity, chemical resistance, and tallies enhanced scratch resistance in comparison to extruded acrylic. Stress cracking on cast acrylic is also far less when compared to machined or solvent exposed pieces.
The process of continuous extrusion is much more economical regarding resource spend. Yet, extruded acrylic remains softer, more prone to scratches, and lower in quality. However, it is more cost effective. This makes extruded acrylic ideal for business signs or simple glazing.
These differences play a critical role in picking the right type of acrylic for specific machining or application requirements.
Extruded acrylic is typically 20 to 30 percent cheaper than the cast acrylic. Which makes it optimal for bulk work or applications with tight budgets.
Because of cutting methods, extruded acrylic has an even thickness over the whole surface of the sheet which diminishes material loss during cutting or machining. For example, the craft sheets have a thickness tolerance of approximately ±10%, which is adequate for maintaining proper application.
The light transmission of extruded acrylic is around 92%, similar to the finest glass. This makes it a good choice for those projects that have high clarity requirements, including protecting barriers and windows.
There is extruded acrylic to soften and facilitate the cutting, drilling, and even the thermoforming processes. For instance, it is one of the best materials for laser cutting because it produces smooth polished edges without requiring post-processing.
With an extruded acyclic density of 1.19 g/cm³, it is approximately two times lighter than glass and offers sufficient impact strength. This decreases structural load and makes it more user-friendly during installation in many different uses.
Such measurable advantages make extruded acrylic appropriate material in such a diverse area like from advertising to designing of buildings. Plus, extruded acrylic is guaranteed to be functional and cost-effective when premium optical quality is sacrificial.
As you decide whether to use cast or extruded acrylic, it is important to have the project prerequisites in mind: optical clarity, budget, machining capabilities and specific application. If they are used for displays or glazing, cast acrylic is ideal because it has better optical quality and offers superior resistance to solvents and more uniform thickness after processing. However, if you are fabricating signage or decorations that are lightweight and inexpensive, special extruded acrylic is ideal as it is cheaper, easier to fabricate, and meets moderate performance standards.
Additionally, cast acrylic has better scratch resistance and ability to endure extreme temperatures. Conversely, extruded types are easily warped when subjected to low heat. There are differences between tolerances and dimensional constraints endured between variations. For example, extruded sheets are more sensitive to intensive machining, resulting in undesirable variable thickness. By knowing these differences and the achieved goals, the materials can be selected to best suit the project’s aesthetics and functionality.
Heat generated during a machining process may be excessive, resulting in melting or surface distortion of the acrylic. Employing a water-soluble coolant or mist spray often works best. In addition to applying a coolant, ensure constant temperatures are maintained by applying it evenly while adjusting the rate at which the cutter is fed and its rotation speed. High standards of the machined acrylic can be achieved with these optimizations and limits set to avoid damages.
When choosing a coolant for CNC acrylic machining, pay attention to its compatibility with the cutting material and its effectiveness in cooling. Coolants in use include water-soluble synthetic fluids, emulsifiable oils, and mist lubrication systems. Water-soluble coolants are convenient for acrylic workpieces as they do not leave behind so much residue that blossoms into clumping. Mist lubrication systems, on the other hand, protect the tool and workpiece from excessive heating without the need for mists to be applied thick. The ideal coolant is dependent on other elements such as cutting speed, feed rate, and particular bits of machinery in use. But these factors must be followed properly.
Adjusting the spindle speed single-handedly affects the degree of cooling while operating the CNC machine and the quality of the machining simultaneously. The most relevant factors that come into the picture include material grade, tool size, and surface roughness.Material Type: Machining more malleable substances, like aluminum, can be accomplished effectively at elevated spindle velocities of 15,000 to 30,000 revolutions per minute. However, materials that are more resilient, like titanium and stainless steel, can only be machined and shaped at considerably lower speeds of 1,000 to 4,000 revolutions per minute, to help reduce the potential excessive heating.
Tool Diameter: The increased area of contact where large tool diameters engage makes it necessary for a decrease in spindle rotation to guard against overheating, as well. A 1-inch end mill could easily perform efficiently within the 2500 RPM unthrottled range, while 12 000 RPM or above 0.25-inch mill could operate quite well.
Surface Finish Requirements: These specific requirements may be eclipsing the optimal conditions for improved spindle velocities and feed rates. Having spindle speeds that remain below the threshold allows for the tool to inflict more cutting compared to abrasive actions and overheating for cutting surfaces with a precision roughness average of micrometers ideal of 0.4 upwards of 16 infrequently will inflict chatter.
Real-time monitoring with spindle speed sensors in tandem with advanced CNC controls can enable significant alterations and ensure constant cooling during operations, optimizing spindle speeds in tandem with increasing tool life while minimizing the chances of thermal distortion of the workpiece.
Special drill bits for plastics are of utmost importance to avoid the material from cracking or chipping while drilling acrylic. Acrylic drill bits tend to have a steeper tip angle and have surfaces that cut instead of grind, which decreases pressure on the material. Other bits consisting of high-speed steel (HSS) which have been ground at the tips, are also useful, but only when working at low speeds. Make sure to use a slow feed rate, and set the drilling speed adjustable between 500 and 1000 RPM based on the acrylic thickness in order to achieve the best output. Try lubricants or compressed air in order reduce to heat that may cause the acrylic to shatter or deform.
When drilling acrylic, make sure to firmly attach the material, so it does not shift or vibrate during the process. Doing so minimizes the chance of the holes, as well as the material, being damaged. Clamp a piece of wood behind the acrylic sheet to prevent breakout on the exit side. When the diameter of the holes needed is large, start by drilling a few pilot holes before stepping up the size of the drill bits so as to maintain the integrity of the hole and the material. Regularly sharpen your drill bits because dull bits are likely to melt and damage the work piece.
Meticulous management of heat generation is key to avoiding the melting of acrylic material when carrying out drilling operations. Drilling is bound to overheat material if there is excessive friction or if there is prolonged contact between the drill bit and the acrylic. As per research, the ideal acrylic drill speed is between 500 and 1000rpm depending on the type of drill bit and thickness of the sheet. Anything faster, the material will overheat, and anything slower will result in jagged holes.
Further data shows that managing feed rate at around 0.002-0.008 Inches per revolution (IPR) consistently helps with lowering localized heat buildup. These temperatures can be lowered even further with water or specialized cutting fluids for sustained drilling, Typically more than 30% can be achieved. To achieve results of the highest expectation while ensuring there is no deformation, it is always best to remain under these temperatures.
The surface finish of machined or finished acrylic parts is significantly impacted by the skillful selection of cutting depth. A cutting depth of 0.010 to 0.020 inches per pass minimizes chipping and cracking while internal stresses are not built up. Such depths also enable smoother finishes and eliminate the need for excessive finishing processes, such as polishing in a lathe. Specialized grade, single-flute, sharpened cutters prevent material drag and achieve cleaner cuts. Furthermore, the rate of tool feed for these CNC tools is from 50 to 150 inches per minute, depending on the used cutter and thickness of the material. These feed rates provide a surface finish that remains consistent. These well-defined parameters lead to increased dimensional accuracy and enhance the look of machined acrylic.
The proper choice of an end mill is vital to the surface finish of machined acrylic components. An acrylic sheet is often routed into simpler shapes using 1/4 inch single-flute and two-flute end mills as they provide better cutting scores and lower heat cutting rates that can lead to melting or damaging the surface of the material. For example, an acrylic end mill with 1/8 inch shaft works best in spindle speeds of 14,000 to 18,000 RPM when cutting thin sections of acrylic sheets under 0.25 inches thick. Larger starting shaft sizes increase routing performance for thick sheets, so an end mill with a diameter of quarter inch is best suited for sheets thicker than 1/4 inch at spindle speeds of 10,000 to 12,000 rpm
Experiments show that a feed rate of 100 Inches Per Minute (IPM) with 1/8 single flute end mills at a depth of 0.015 inches, compared to other methods, greatly reduces tool marks while still achieving a consistent clear finish with moderate clarity in acrylic. As expected, two flute versions tend to reduce the performance slightly, on the other hand, they also excel at complex designs due to improved edge quality.
To minimize material waste on projects, it’s important for machinists to understand the nuances between the spindle speed, feed rate, and cutter geometry so they can achieve top-of-the-line accuracy. Moreover, regular checking and changing of damaged tools increases the quality of the finished surfaces on the acrylics even further.
The aforementioned techniques should be followed in the given order to achieve a smooth surface finish on acrylic details after machining them post-operationally.
Sanding: Start from the coarsest sandpaper, for example, grit 400 to get rid of the tool marks and afterwards use sandpaper with grit between 600 and 1200 to achieve a finer surface.
Flame polishing: A propane or butane torch can be used to heat the edges of the acrylic and, with proper care and focus, instantly restore clarity.
Buffing: Utilizing soft-buffed polishing compounds, high gloss can be achieved and preserved on curved as well as flat surfaces.
Chemical polishing (optional): Using dichloromethane in an anti-evaporating environment can further aid the treatment of acrylic parts in industrial settings.
A careful selection of the method enables the machinists to make modifications to the parts that are visually and operationally important.
A: Setting proper speeds as well as feeds are vital in getting good results in acrylic machining. When using a CNC machine, start with low RPMs, around 18k with appropriate feed rate as per the size and type of endmill used. Also, keep the depth per pass conservative to ensure smooth finish and avoid the chances of melting.
A: You can cut acrylic with wooden bits, but best results are not guaranteed so caution is needed. Since wood bits are not sharp enough; the outcome will be chipping or melting of the acrylic. Rather, employ endmills that cut acrylic, such as o-flute or helical bits for higher quality cuts.
A: Eagerly make attempts to prevent melting while cutting acrylic by confirming that the feed and the speed are balanced. This entails ramping the spindle speed down below the feed speed to cut down on the friction. Furthermore, when you begin cutting you should do it from a ramp to prevent the tool from over-engaging which worsens the excessive heating.
A: Whether the acrylic piece is properly placed is very pertinent for ensuring that quality work is done. Correlation of double sided tape or vacuum fixtures can aid in holding the acrylic firmly in position. These measures prevent displacement of the acrylic during the cut, so there is a decreased chance of making mistakes.
A: To process acrylic and polycarbonate, endmills should be selected with utmost care. For better cutting and chip clearance, O-flute and single-flute endmills are excellent recommendations as they reduce the chances of melting. The best outcome is guaranteed when the endmill is designed specifically for plastics.
A: To mill acrylic with no surface blemishes, make use of a major sharp endmill alongside correct speeds and feeds. Set higher feed rate with the workpiece secured on a steady surface. Air or mist could also be used as a lubricant which helps reduce temperatures, resulting in much clearer finishes on acrylics.
A: Engraving acrylic entails adjusting and controlling the parameters for CNC acrylic cutting. Employ a sharp fine bit as well as different speeds and feeds until satisfactory settings are arrived at. It is better to do many shallow passes than a single deep one so that the acrylic remains crack free.
A: You can cut and drill into acrylic with the use of a standard CNC, however, it is vital that the appropriate tools are used. For satisfying cuts through acrylic, it helps to have a CNC that has adjustable speeds and feeds along with endmills configured to cut through plastics.
A: In order to achieve clearn cuts through clear acrylic, ensure that sharp endmills are used and that precise feeds and speeds are utilized. It is beneficial to smoothen the toolpath and clamp the acrylic into place to prevent movement. A cooling mechanism should also be put in place to reduce temperature, which may make the material cloud or melt.

Manufacturing processes are quite complex, and the choice of a production method is directly related
Learn More →
There are two major manufacturing methods for producing plastic prototypes that most people find useful
Learn More →
As a person involved or interested in the design and production of plastic components, it
Learn More →